Building FFMPeg Layer for a Lambda function
Hi, Today I am going to walk you guys through the process of creating a layer specifically for the FFMpeg library. I had to go through repetitive cycles of trial and error until I figured out what works and how can I actually put this binary in a lambda function and run the ffmpeg command from a lambda. I am creating this layer using the AWS Cloudshell, you can choose to do this on an Amazon Linux AMI EC2 as well. So, here we go.
- Log in into the AWS Console and open the AWS CloudShell.

2. In the CloudShell, run the following command to install the ffmpeg library’s binary files.
wget https://johnvansickle.com/ffmpeg/releases/ffmpeg-release-amd64-static.tar.xz
3. To verify the authenticity of tar.xz file downloaded, first download the .md5 file and then verify the hash using the md5sum command.
wget https://johnvansickle.com/ffmpeg/releases/ffmpeg-release-amd64-static.tar.xz.md5

md5sum -c ffmpeg-release-amd64-static.tar.xz.md5
4. If the md5sum result returns “OK”, then extract the contents of the tar file using the following command.
tar xvf ffmpeg-release-amd64-static.tar.xz
5. Create a directory ffmpeg/bin using the following command:
mkdir -p ffmpeg/bin
6. Copy the contents of the extracted “ffmpeg-6.1-amd64-static/ffmpeg” folder into the “ffmpeg/bin/” directory created.
cp ffmpeg-6.1-amd64-static/ffmpeg ffmpeg/bin/Note: For me, the wget command installed the ffmpeg-6.1 version that’s why the copy command copies the ffmpeg folder contents from the ffmpeg-6.1-amd64-static folder. Before you run the copy command, please check the extracted folder name by running the ls command and then changing the folder name in the cp command.

7. Navigate into the ffmpeg/ folder and then zip the contents of the binary using the following command. The zip file is created in the previous working directory so you will have to navigate back a folder to find the ffmpeg.zip file.
cd ffmpeg

zip -r ../ffmpeg.zip .

cd ..

ls -lrth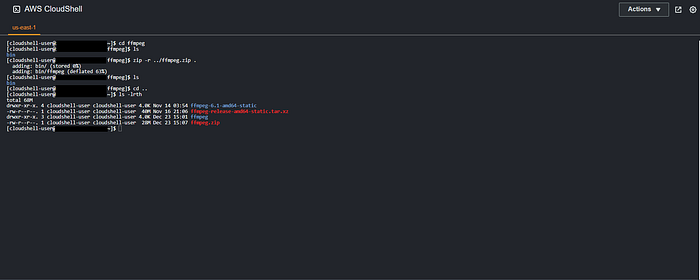
8. Use the aws s3 copy command to put the ffmpeg.zip file in a S3 bucket.
aws s3 cp ffmpeg.zip s3://YOUR-BUCKET-NAME-HERE/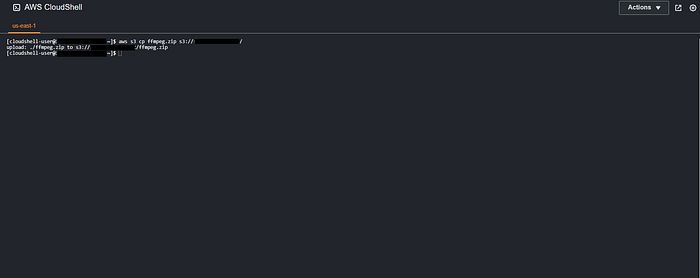
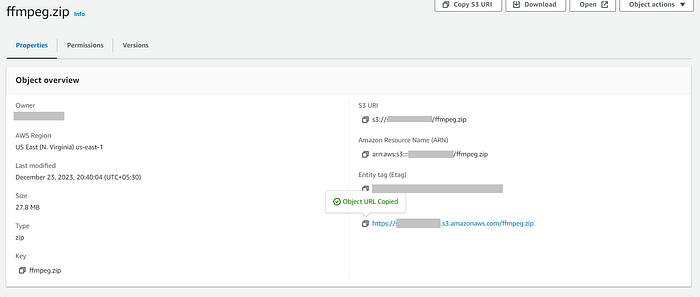
9. Navigate into the S3 bucket and click on the ffmpeg.zip object that you uploaded just now via AWS CLI. Copy the “Object URL” for this S3 object.
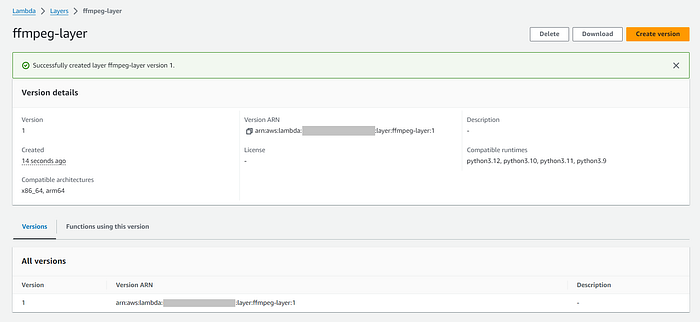
10. Navigate into the AWS Lambda Console and under the “Additional Resources” menu, click on “Layers”. Click on “Create Layer”. Give the layer file a name, paste the S3 Object URL for the ffmpeg.zip that we copied previously. In the runtimes dropdown, please select the lambda version that you want to work with. In the next steps you will see that, I have used python 3.9 for my lambda function.

11. Scroll down to the bottom of the page and click on “Create” to create the layer.
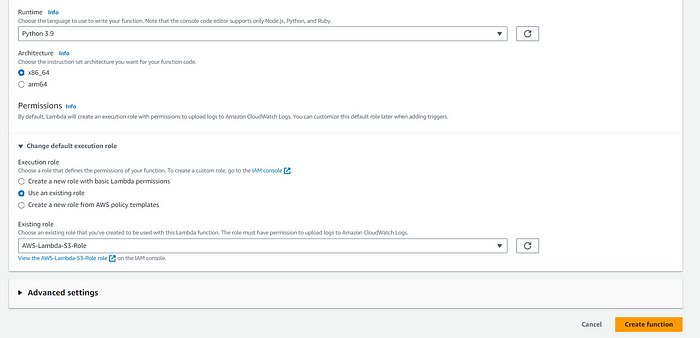
12. In the Lambda console, Click on Functions -> “Create Function”. Enter a name for the function, choose a python runtime. I am using “Python 3.9” for this blog.

13. Under Permissions tab, expand “Change default execution role”. You can either create a new IAM role or choose an existing one. For this blog, I am choosing the “Use an existing role” option. The role that I am using has basic lambda IAM permissions along with Amazon S3 Full Access. Click on “Create function”.
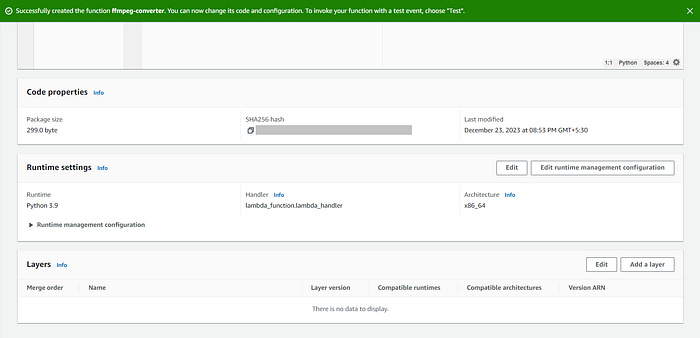
14. Please wait for the function to be created. After its created, scroll down to the bottom of the page and look for the “Layers” tab. In this tab, Click on “Add a Layer”.
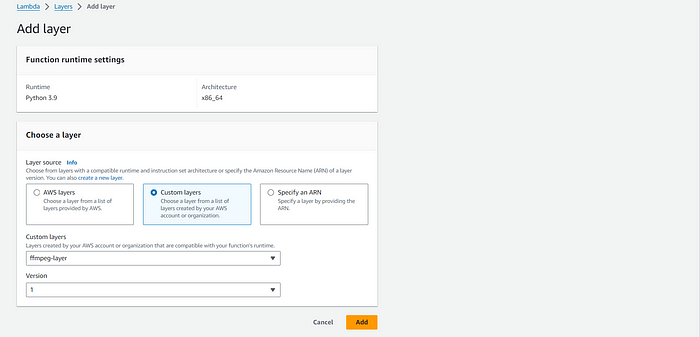
15. Choose the “Custom layers” option, under the 1st dropdown, choose the name of the layer we created in the previous steps and in the 2nd dropdown, choose the layer version and click on “Add”.
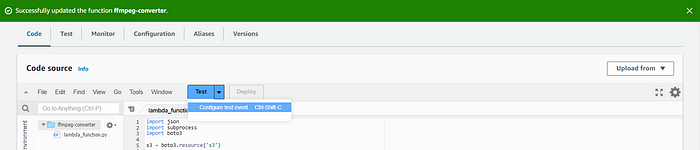
16. Now, in the lambda code editor, copy the code snippet given below and Deploy the lambda.
Note: The code block above assumes that the file that you want to perform operations on is present in S3. So, you will have to update the code to add the S3 bucket name and the file name.
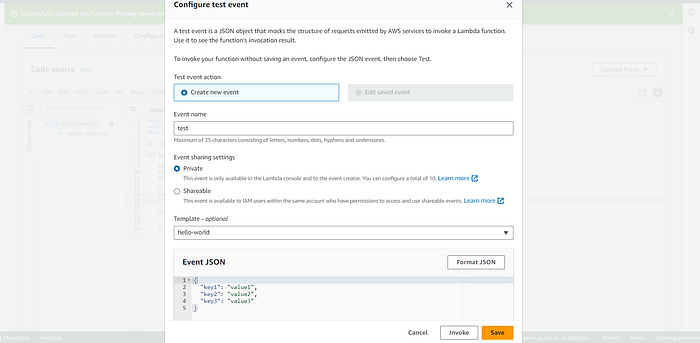
17. To test out this code, we have to configure a lambda test event. Click on the dropdown icon next to the “Test” button and click on “Configure test event”.
18. Give the test event a name and then click on “Save”.
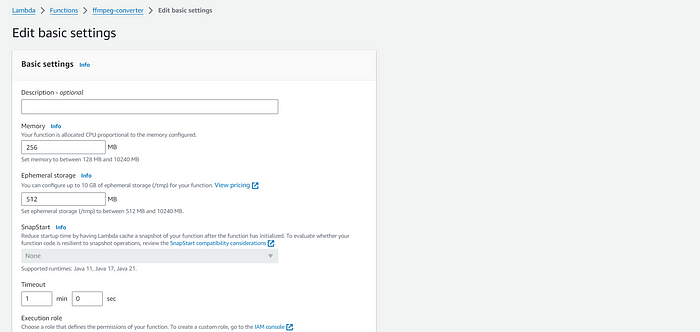
19. Before you run the lambda using the test event, we have to edit the basic configuration of the lambda function. Look for the “Configuration” tab -> “General Configuration”. Click on “Edit”. In this edit basic settings page, increase the Memory from 128 MB to 256 MB and increase the lambda timeout to 1 minute from 3 seconds. Click on “Save”.
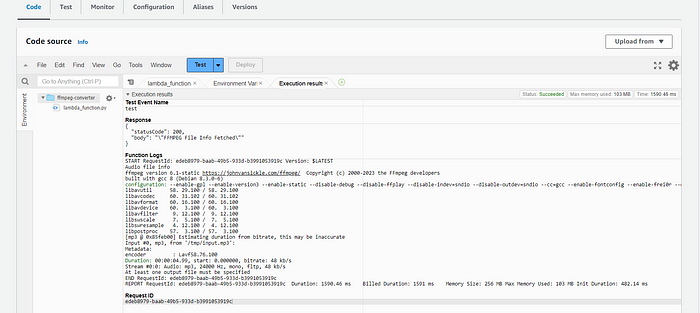
20. Now click on the “Test” button. This will run the lambda function and you will be able to see the ffmpeg command in action.
Thank you for reading through this entire blog. Hope this helped :)
